A bar tack can reinforce a pocket opening where the garment guide calls for one. This example is limited to the US Brother CS7000X and its linked manuals; it is not a general repair, a load-rated reinforcement, or a substitute for sewing the pocket seam. Confirm that the model name and manual match before following a chart entry.
Confirm the chart and understand the measurements#
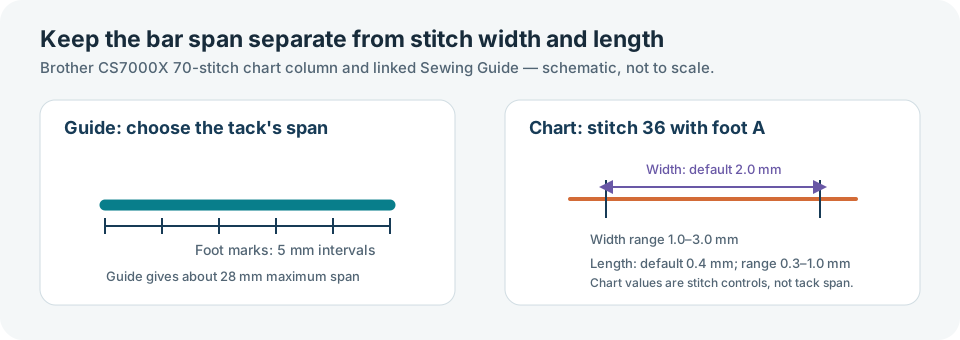
In the CS7000X’s 70-stitch chart column, bar tack is stitch 36 and uses buttonhole foot A. The chart lists a default width of 2.0 mm (range 1.0–3.0 mm) and length of 0.4 mm (range 0.3–1.0 mm). Those are stitch-control values for this chart column, not a promise that the same settings or stitch number apply to another machine.
The Sewing Guide shows foot markings in 5 mm increments and a bar-tack span of about 28 mm maximum. That span is different from stitch width and stitch length. Measure the intended reinforcement area against the foot’s marks before sewing; do not treat the guide’s approximate span as a strength rating.
Set up and sew a test#
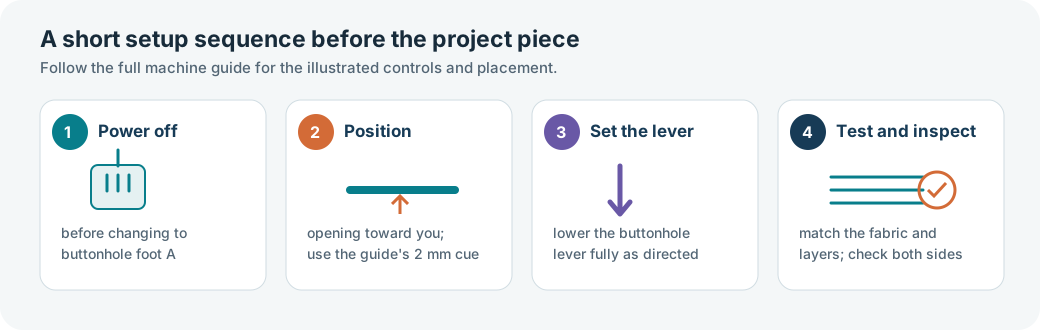
- Read the CS7000X Operation Manual and Sewing Guide for your machine’s version. Switch the machine off before changing the presser foot. Attach buttonhole foot A as shown in the manual, and thread the upper thread through the hole in the foot as the Sewing Guide directs.
- Make a test from the same fabric and layer stack as the pocket. Position the pocket opening toward you. The guide’s placement cue puts the needle drop 2 mm in front of the intended bar-tack position. Use the foot marks to check the span; they do not change the chart’s stitch width or length.
- Lower the presser foot and pull the buttonhole lever fully down. Follow the guide’s control sequence, holding the upper thread gently as you begin. Before powered sewing, turn the handwheel slowly to confirm the needle clears the foot.
- Inspect both sides of the sample for feeding, skipped or loose stitches, and fabric damage. When the tack is complete, raise the presser foot, remove the work, cut the threads, and return the buttonhole lever as the guide shows.
Do not pull or push the fabric to make it feed. Stop if the needle contacts the foot or plate, the layers do not feed, or the sample damages the fabric; recheck the exact chart and manual before trying again. The cited sources do not establish a maximum fabric thickness, reinforcement strength, or suitability for carrying a load.
For the seam itself, see choosing a stitch for the seam job. A bar tack is distinct from a buttonhole; use the buttonhole setup guide for that task. For model, needle, thread, and material checks, begin with the machine settings and fabric guides sections.