This guide is limited to the U.S. CS7000X and a hook-and-loop product expressly designed for sewing. Identify the tape before setting up the machine: a peel-and-stick closure has adhesive at the needle path and needs a different application method. This is a setup and sampling guide; it does not establish the strength or load limit of a finished closure.
Identify the fastener#
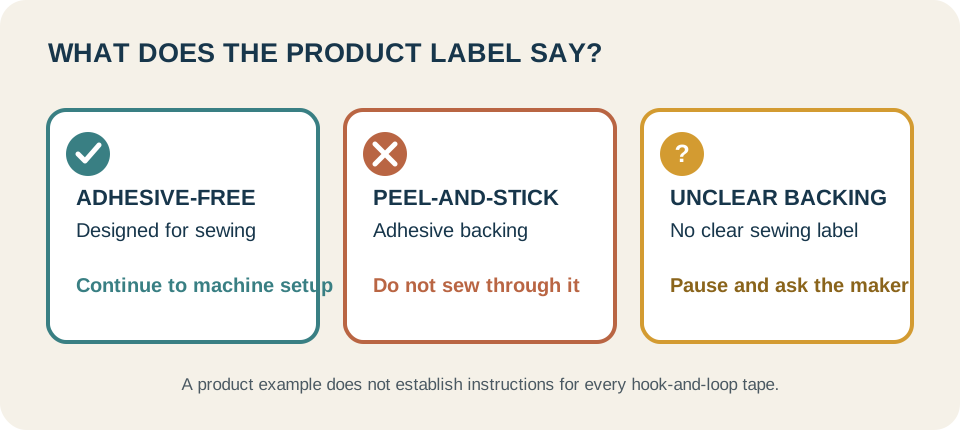
Brother’s CS7000X Sewing Guide, printed page 14 says to use only adhesive-free hook-and-loop tape designed for sewing. It warns that glue adhering to the needle or bobbin case may cause malfunction. The separate VELCRO Brand Sticky Back for Fabrics is a peel-and-stick, no-sew product; its maker warns that its adhesive can make a sewing-machine needle sticky. Do not sew through that product. If the backing or instructions are unclear, pause and check the exact package or ask its maker whether the tape is intended for machine sewing.
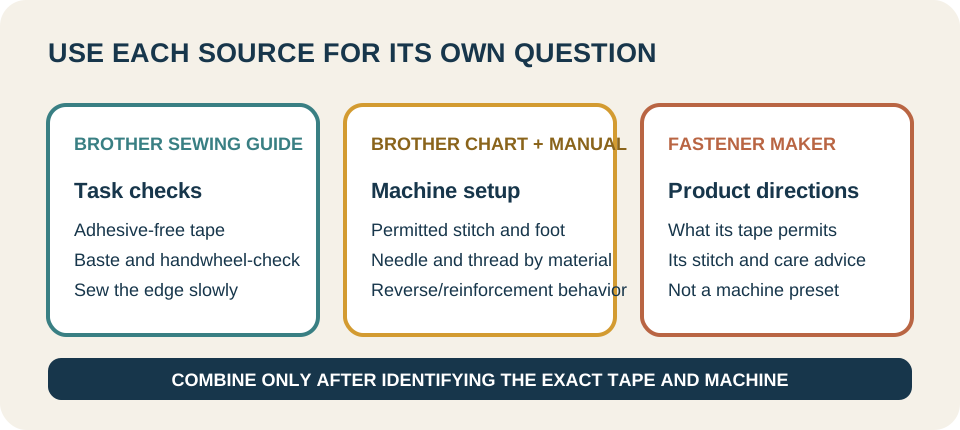
VELCRO Brand’s Sew On Tape instructions call for a straight stitch and recommend backstitching over the first pass for that product. Treat those as product directions, not settings for every fastener. Another brand or construction may have different instructions.
Match a charted setup to the CS7000X#
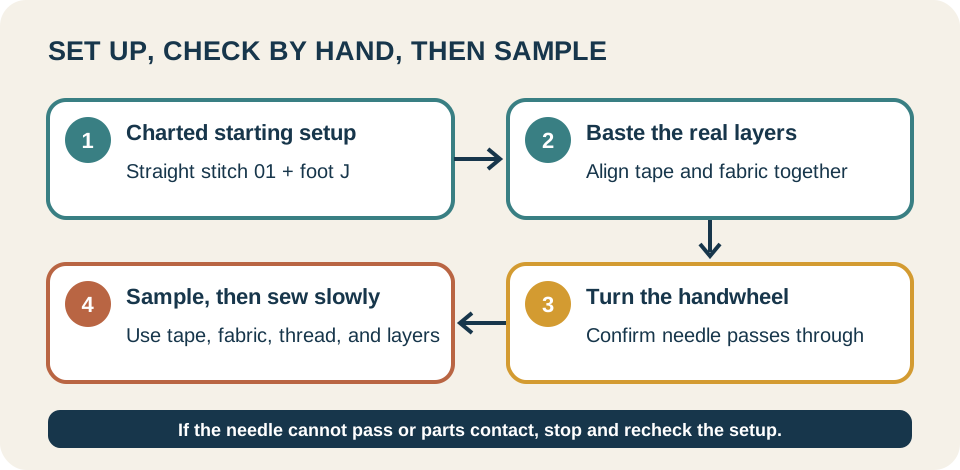
For VELCRO Brand Sew On Tape, the maker’s straight-stitch direction can be paired with the CS7000X chart’s middle straight stitch 01 and zigzag foot J. This is a practical pairing of two sources, not a special fastener preset listed by Brother. Check the Stitch Chart and the U.S. CS7000X manual index for the exact machine before selecting controls or changing feet.
Choose needle and thread from the Operation Manual’s fabric, thread, and needle table for the fabric and number of layers. Brother’s Sewing Guide cautions that thin 65/9–75/11 needles may bend or break when sewing hook-and-loop tape; it does not specify one universal size for this task. If the needle does not pass through the tape, Brother directs the user to change to a needle size for heavier fabric and consult the Operation Manual. Do not force the handwheel or push the layers through.
VELCRO Brand’s page also gives general needle, stitch-length, tension, and walking-foot suggestions for its own product. Those broad suggestions do not set CS7000X defaults. For example, Brother’s chart says not to sew reverse stitches with its walking foot. The chart’s reverse/reinforcement behavior is stitch-dependent; check the exact entry and foot before using an extra backstitch. This guide does not promise that a reinforcement pass is required or that it provides a particular closure strength.
Baste, check, and sample#
- Mark the closure alignment on the actual fabric. Baste the fabric and tape together, as Brother’s guide directs; keep the hook and loop aligned as the finished closure must sit.
- With the charted foot and stitch selected, turn the handwheel by hand and lower the needle into the tape. Confirm it passes through the tape and every fabric layer before sewing under motor power.
- Make a trial seam using the same tape, fabric, thread, and layer count as the project. Check penetration, feeding, stitch formation, shifting, and alignment while opening and closing the sample.
- If the needle will not pass, or the setup contacts the foot or plate, stop. Recheck the selected needle, stitch, foot, and material instructions before trying again. When the sample behaves as intended, follow Brother’s slow-speed guidance and sew along the tape edge.
The sample is a check of your own materials and setup, not a load test. For a different closure task, see sewing zippers and piping or sewing buttons by machine.